Installing an eSIM on Your Apple Device
Follow these steps to install an eSIM on your Apple device:
IMPORTANT!
Before you begin, ensure you have:
1. A reliable internet connection, ideally via Wi-Fi or a solid 4G network.
2. A device that supports eSIM functionality. If you're uncertain, refer to the compatible device list [here].
3. Confirm that your device is not restricted to a single network.
Don't forget to turn on "Data Roaming" after the installation!
---
INSTALLATION USING A QR CODE
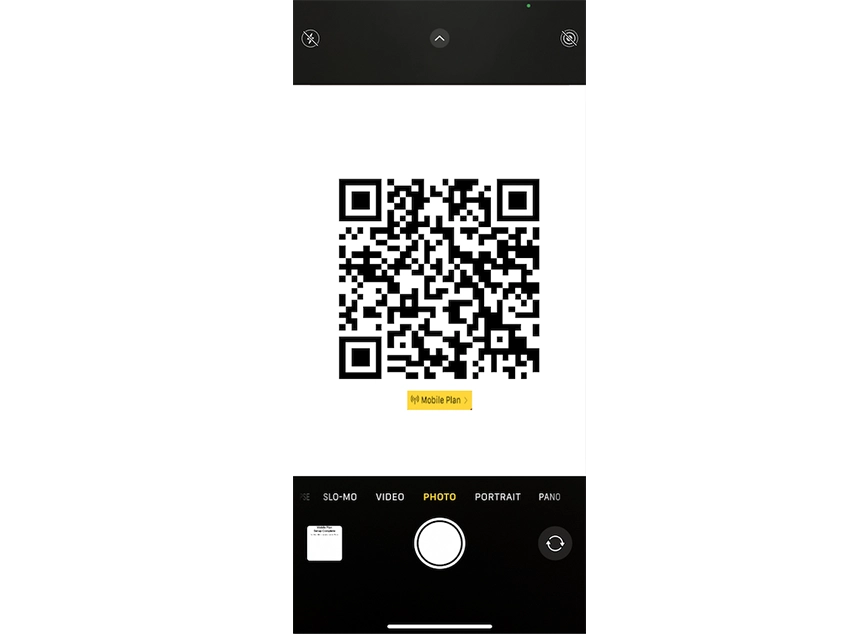
STEP 1: SCAN THE QR CODE
You have two options for scanning the QR code:
Option 1:
Open the camera on your device > Scan the QR code > Tap "Mobile Plan"
Option 2:
Go to "Settings" > Tap "Mobile / Cellular Data" > Tap "Add eSIM" > Tap "Use QR Code" > Scan the QR code provided
 STEP 2:
When prompted, tap "Add." > Allow up to 10 minutes for the eSIM to activate. > Tap "Done."
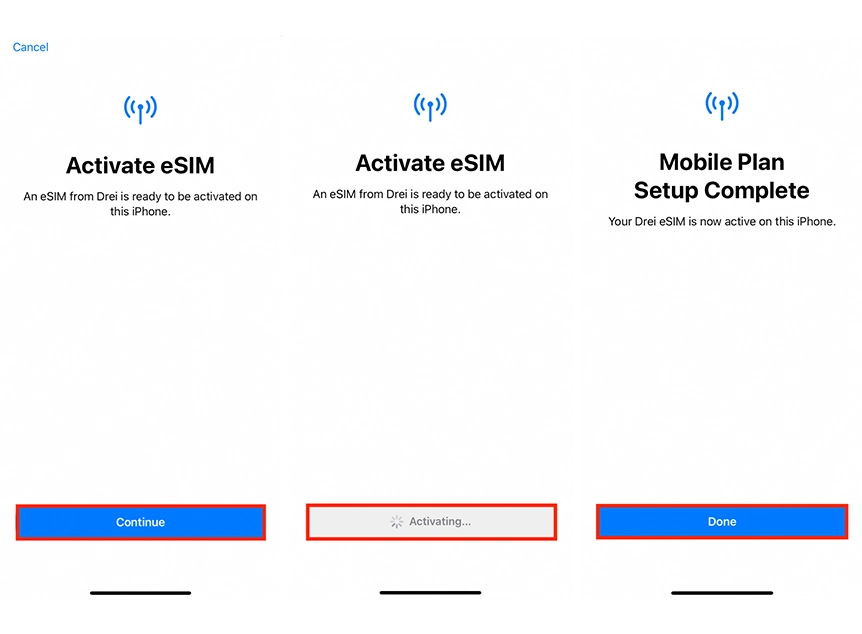
STEP 3:
There are two options available at this stage, we advise proceeding with option 3.1
3.1 - Tap "Continue" and then move to STEP 4 or...
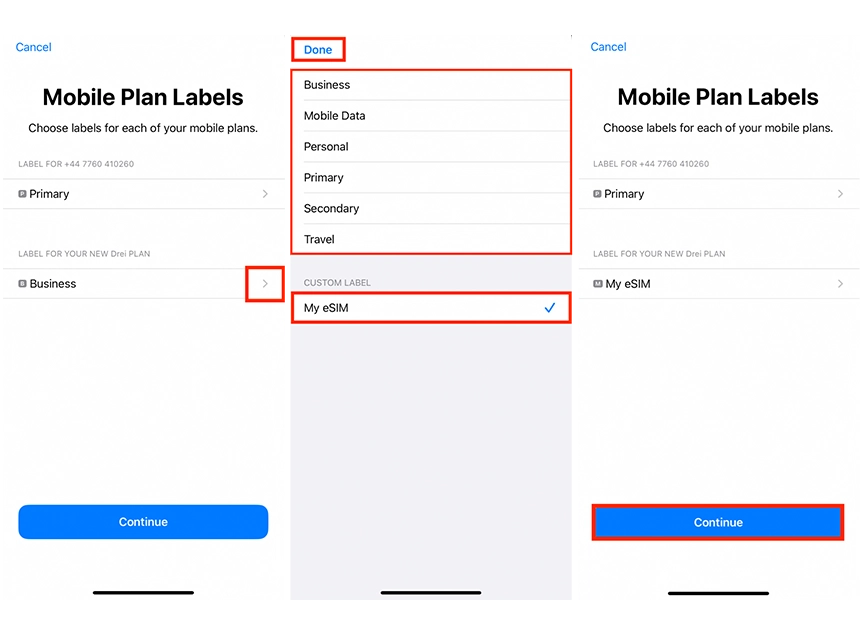
3.2 - You have the option to modify the "eSIM Label" (the name of the eSIM) instead of using the default name. If you would like to modify the eSIM label before moving to the next step;
Tap ">" (the right hand arrow) > Then either choose one of the preset label's or type the name you want to use in the "Custom Label" box > Tap "Done" > Tap "Continue"
In this example the name of the esim was changed to "My eSIM" using the custom label box.
Please note; Option 3.2 won't be offered to you if you have more than one eSIM already installed on your device, so a custom label can only be altered after the SIM install is complete.
STEP 4:
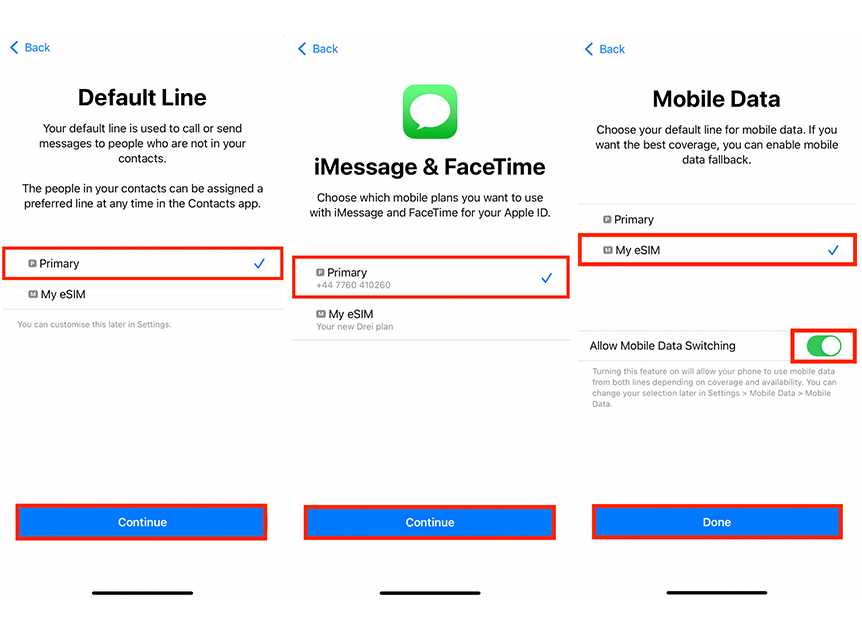
Configure the following settings as suggested:
• Set Default Line to "Primary" > Tap "Continue"
• Set iMessage & FaceTime to "Primary" > Tap "Continue"
• Set Mobile Data to your previously chosen esim label, in this example "My eSIM"
Allow Mobile Data Switching is defaulted to off, choose you preference using the toggle > Tap "Done"
"Allow Mobile Data Switching" will allow your device to use mobile data from both lines depending on coverage and availability. You can change your selection later in settings.
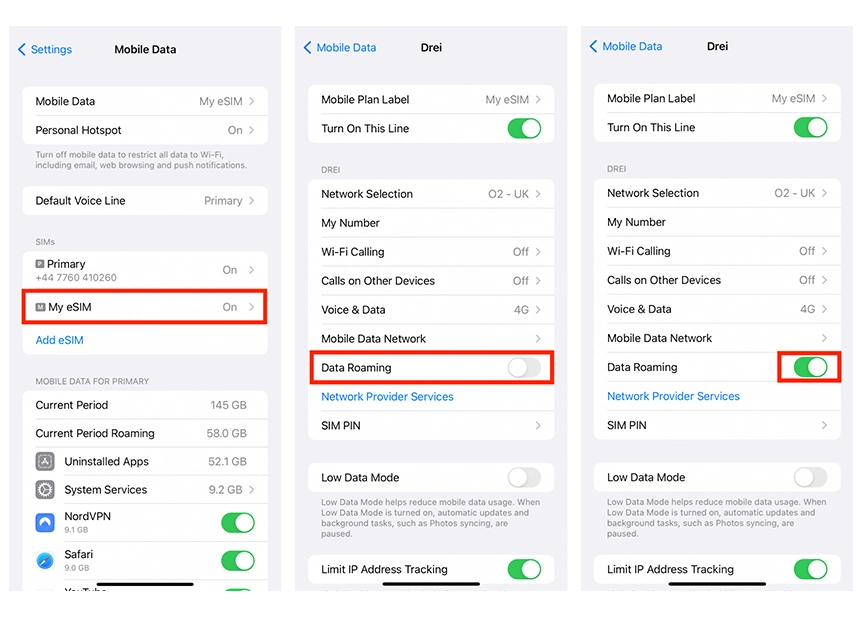
STEP 5:
The eSIM is now installed and configured. Data Roaming MUST be ENABLED in order for the eSIM to work.
Go to "Settings" > Tap "Mobile / Cellular Data" > Select desired SIM > Move the toggle switch to "On"
Don't forget to turn on "Data Roaming" after install!

---
ESIM MANUAL INSTALLATION
STEP 1:
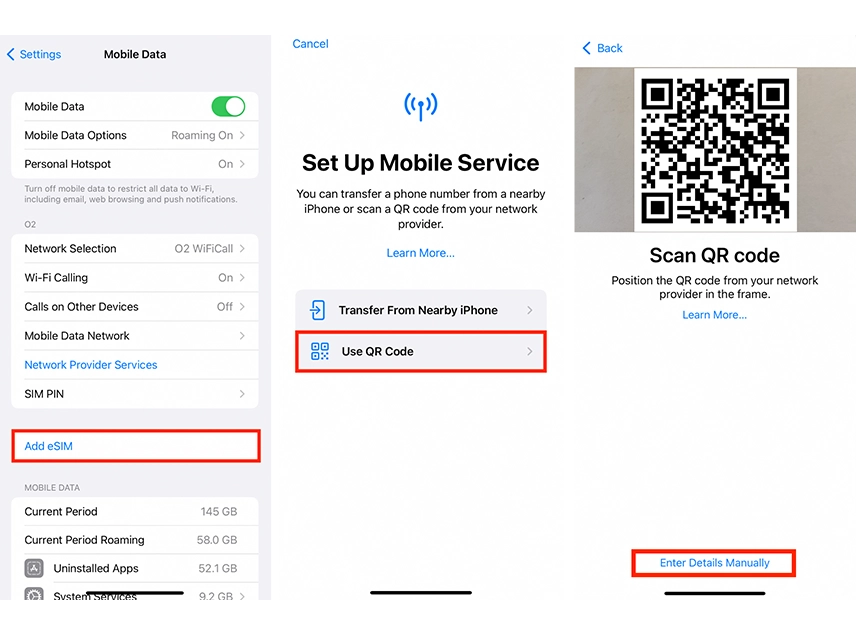
Go to "Settings" > Tap "Mobile / Cellular Data"
STEP 2:
Tap "Add eSIM" > Tap "Use QR Code" > Tap "Enter Details Manually"
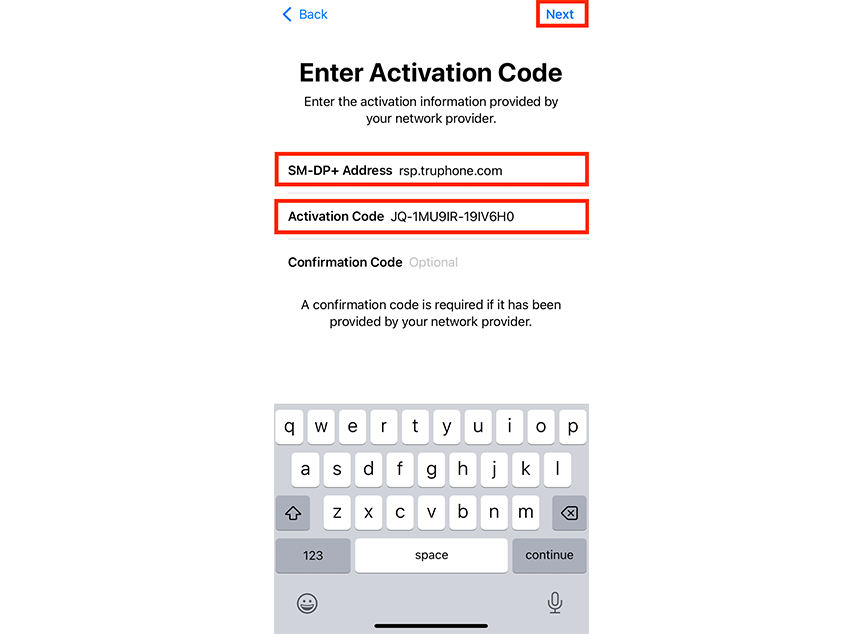
STEP 3:
Enter the "SMDP Address" and the "Activation Code" provided > Tap "Next". Leave "Confirmation Code" blank
STEP 4:
Tap "Continue" > Allow up to 10 minutes for the eSIM to Activate > Tap "Done"

STEP 5:
There are two options available at this stage, we advise proceeding with option 5.1.
5.1 - Tap "Continue" and then move to STEP 6 or...
5.2 - You have the option to modify the "eSIM Label" (the name of the eSIM) instead of using the default name.
If you would like to modify the eSIM label before moving to the next step;
Tap ">" (the right hand arrow) > Then either choose one of the preset label's or type the name you want to use in the "Custom Label" box > Tap "Done" > Tap "Continue"
In this example the name of the esim was changed to "My eSIM" using the custom label box.
Please note; Option 5.2 won't be offered to you if you have more than one eSIM already installed on your device, so a custom label can only be altered after the SIM install is complete.
STEP 6:
Configure the following settings as suggested:
• Set Default Line to "Primary" > Tap "Continue"
• Set iMessage & FaceTime to "Primary" > Tap "Continue"
• Set Mobile Data to your previously chosen esim label, in this example "My eSIM"
Allow Mobile Data Switching is defaulted to off, choose you preference using the toggle > Tap "Done"
"Allow Mobile Data Switching" will allow your device to use mobile data from both lines depending on coverage and availability. You can change your selection later in settings.
STEP 7:
The eSIM is now installed and configured. Important: Data Roaming MUST be ENABLED in order for the eSIM to work.
Go to "Settings" > Tap "Mobile / Cellular Data" > Select desired SIM > Move the toggle switch to "On"