Installing an eSIM on Your Android Device
Follow these steps to install an eSIM on your Android device:
IMPORTANT!
Before you begin, ensure you have:
1. A reliable internet connection, ideally via Wi-Fi or a solid 4G network.
2. A device that supports eSIM functionality. If you're uncertain, refer to the compatible device list [here].
3. Confirm that your device is not restricted to a single network.
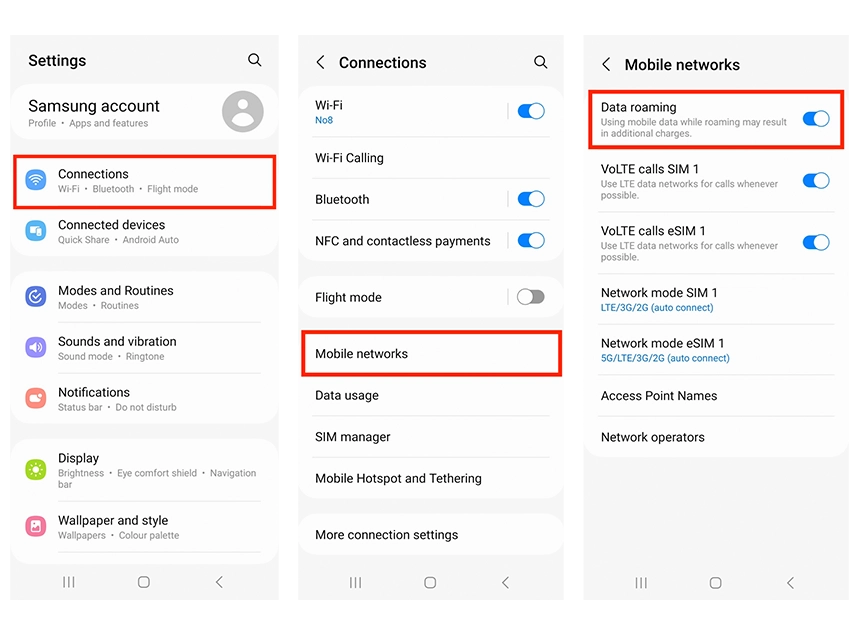
Don't forget to turn on "Data Roaming" after the installation!
---
INSTALLATION USING A QR CODE
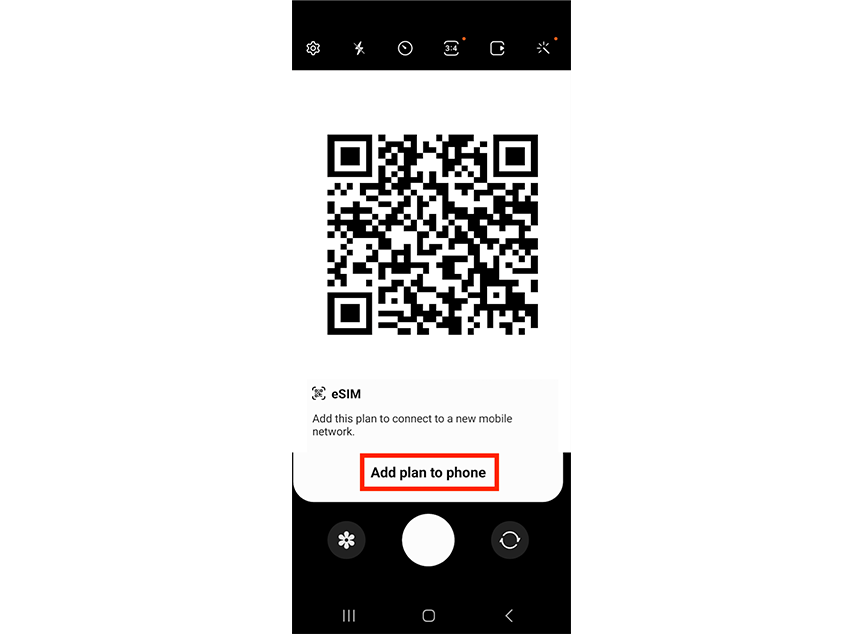
STEP 1: SCAN THE QR CODE
You have two options for scanning the QR code:
Option 1:
• Open the Camera app > Scan the QR code > Tap "Add plan to phone."
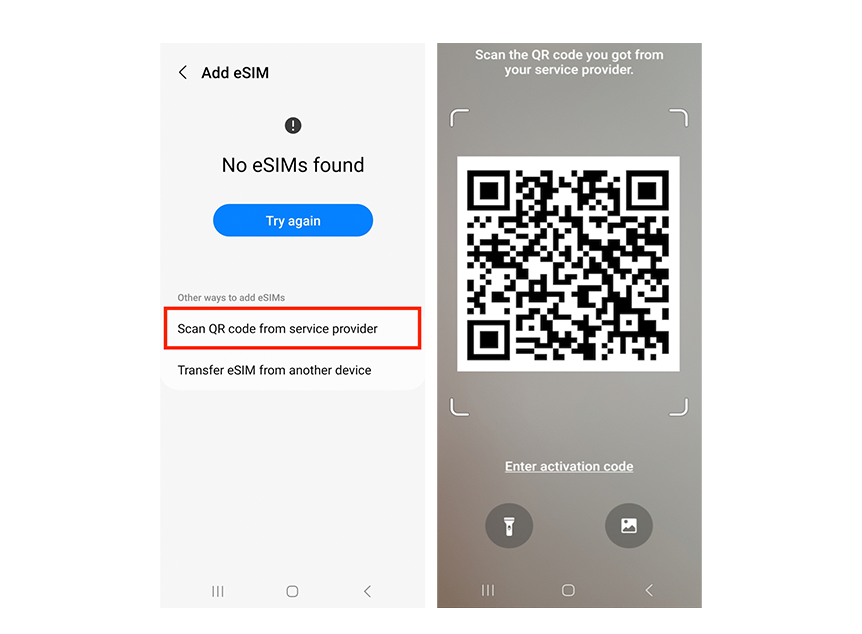
Option 2:
• Go to Settings > Connections > SIM manager > Add eSIM.
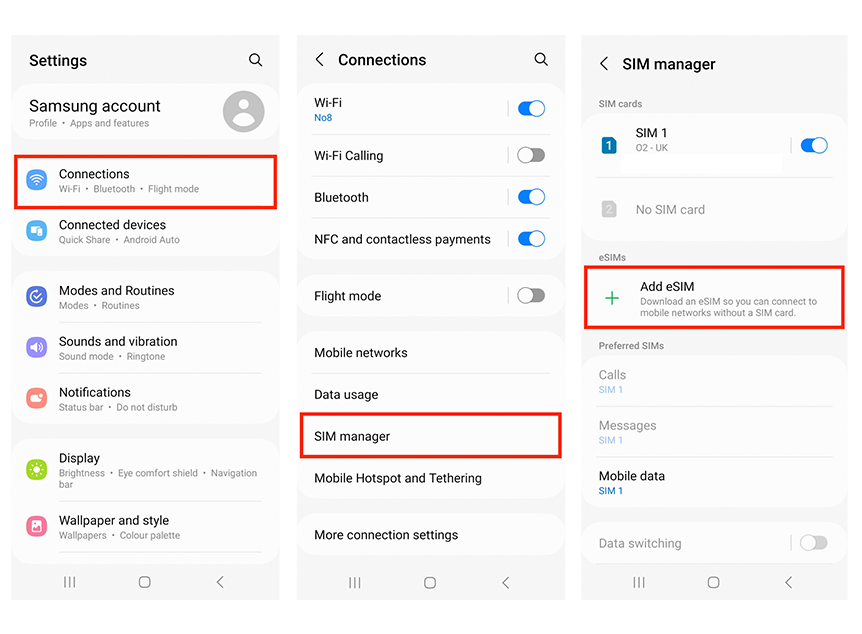
• Select "Scan QR code from service provider." > Scan the QR code provided.
STEP 2: ACTIVATE THE ESIM
• When prompted, tap "Add." > Allow up to 10 minutes for the eSIM to activate. > Tap "Done."
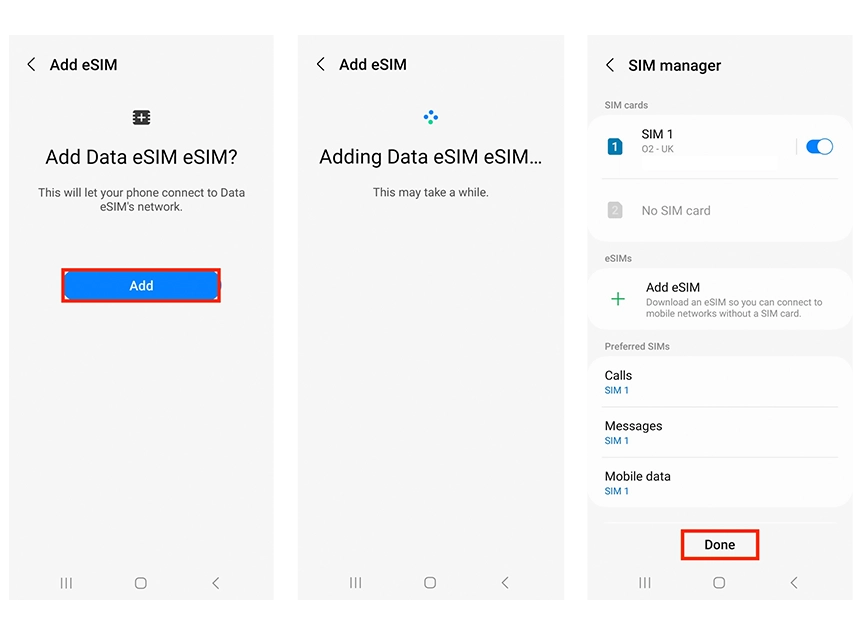
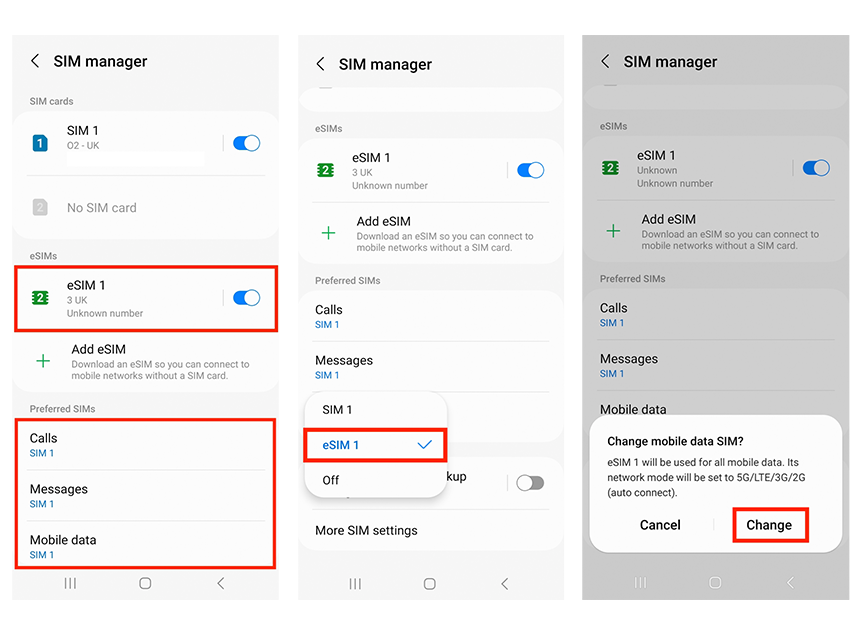
STEP 3: CONFIGURE SIM/ESIM SETTINGS
• Ensure "Calls" and "Messages" are set to your original primary SIM.
• For Mobile Data, tap "Mobile Data.: > Select the eSIM and tap "Change."
STEP 4: ENABLE DATA ROAMING
• Go to Settings > Connections > Mobile networks. Ensure "Data roaming" is turned on.